Being my first project, this section is almost as much for me to remember how it was all done, as well as your interest. I started it in November 2007, after printing out the massive Gryphon Aviation GMAX tutorial as recommended to me Paul Foster, who himself a superb designer and famed for his Vulcan and Canberra models among others. Typically I have only painted before, but we needed a new Sea Hawk, and I needed to get over my fear of modelling for FS, so it was the right time. I chose GMAX, a) because it was free, and b) because I learned some 3D Studio Max about 8 years ago and I know there are similarities in the programs. By July 2008, all modelling was completed, but this is by no means representative of the real, physical time it took, as I have a full-time job and family. At times I hated it, but at others it was very satisfying, no more so than when I first loaded it into FS2004 and took her for a (fairly terrible) spin. Once Jerry Beckwith and Brian Horsey got the FDEs sorted, flying became much more enjoyable (cheers, gentlemen). Here's how the project itself went:
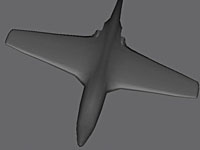
Initial shaping
The Sea Hawk is a tricky design to model in GMAX due to the smooth aerodynamic wing join. It's really one fairly fluid join, but ends in a 'pen-nib' fairing that caused me a quite a few problems. This being my first project, the main mistake I made was not adding enough polygon detail to ensure a very smooth top and bottom to the fuselage - something I had to add near the end of the project. The tip of the day here is there are times when it doesn't pay to to go too low-poly.
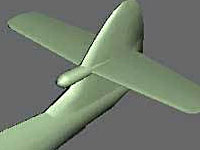
Adding the tailplane and fin
These weren't too bad - after a few shape merges, I was able to extrude what I needed and add them to the main fuselage smoothing groups. Like the previous phase, it requires a huge amount of vertex pushing and scaling. Not rocket science, but you need a tough mouse finger!
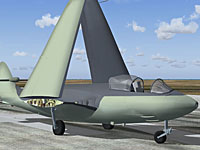
Cutting out the details
This was tricky, selecting the right polys, edge-cutting where needed and then extruding-in to make cockpit, wheel-wells and various other inlets. Along with this was the even more tricky control surface cutting, something I still need improvement in. The gap between the ailerons and flaps is too big, something that I just let go in the sake of getting the project complete. I also skipped cutting out the dive brakes. Finally, I had to set the pivot-points for the ailerons about six million times- not fun. In fact it has become a blur that I have mentally blocked out - all that matters is they are OK now and I have the GMAX file saved!
The cockpit and undercarriage
The less said here, the better. The latter was extrememly tricky, but somehow I muddled through and got them done. I had nightmares about l_tire_still and pivot points. It became an obsession at this point.
Texturing
Scary and very involved. Adding mesh selects and UVWs to get the model mapped correctly is an art in itself. The amount of times I had to remap areas boggles my mind. It seems I am not alone in the amount of times it caused GMAX to crash either. This involved more than one trip to the sacred shrine of FS design that is FREE FLIGHT DESIGN FORUM which helped me to no end. I love that place. Cannot recommend it enough.
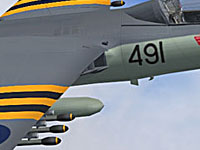
Payloads
The final step. Building these wasn't as bad as I thought and quite fun dare I say at times. This was the true 'production' phase where I had all the generic items in place and was able to just add the payloads and save out each variant as needed. Skippy's pilot and ejector seat models saved me a lot of time here as well.
Panel design
This is where I am at the moment.
Beta-testing
We are almost there.
General release
Some point late this summer, where it will be released here and on Classic British Files.